Top 10 Tiling Best Practices
Embarking on a tiling project, whether it’s for a newly constructed space or a renovation, requires not just selecting the right tiles, but also ensuring you’re equipped with the right tools and knowledge. Tiling can transform a space, offering both functionality and aesthetic appeal. However, to achieve that crisp, professional finish, it’s imperative to understand the various tools involved and the specific purpose each one serves. Beyond tools, the nuances of selecting adhesives, grouts, and understanding the surface requirements play a pivotal role in the outcome. Safety, maintenance, and storage are other facets that cannot be overlooked. Whether you’re a novice DIY enthusiast or a seasoned professional, there’s always something new to learn in the evolving world of tiling. The following ten tips aim to shed light on the most frequently asked questions about tiling tools and practices, providing clarity and guidance for your next tiling venture. Each segment not only delves into the specifics but also highlights key takeaways to ensure the information is both comprehensive and digestible. Let’s embark on this informative journey, ensuring your tiling project stands the test of time, both in durability and design.
1. What are the essential tools for tiling?

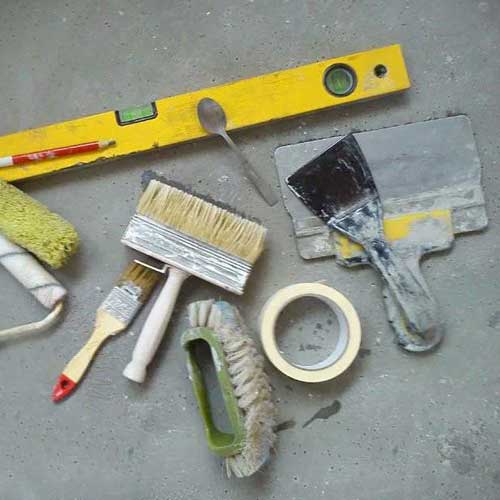
Tiling a space requires a set of specialized tools to ensure precision, durability, and an aesthetically pleasing result. Among the vast array of tiling tools, some are indispensable for any tiling job.
- Tile Cutter: This is the primary tool used for cutting tiles to fit specific dimensions.
- Notched Trowel: Used for spreading adhesive evenly on the surface.
- Tile Spacers: These are small pieces placed between tiles to ensure consistent gaps for grout.
Key Takeaways:
- A tile cutter is crucial for shaping tiles.
- The notched trowel aids in the even application of adhesive.
- Tile spacers maintain uniform gaps between tiles.
2. How do I choose the right adhesive for tiling?

Choosing the right adhesive is paramount to the longevity and appearance of your tiles.
- Type of Tile: Porcelain and ceramic tiles might require different adhesives than natural stone tiles.
- Location: Waterproof adhesives are essential for areas like bathrooms.
- Surface: The surface you’re tiling on, such as concrete or wood, may dictate your adhesive choice.
Key Takeaways:
- Match adhesive to the type of tile.
- Consider the location and moisture exposure.
- Ensure compatibility with the substrate or surface.
3. When should I use tile spacers and which size is best?

Tile spacers are essential for maintaining consistent spaces between tiles for grouting.
- Size Selection: The size of the spacer is often determined by the desired grout line width and tile size.
- Use: Spacers are placed between tiles during installation and removed before grouting.
- Variety: They come in various sizes, typically ranging from 1/16 inch to 1/8 inch.
Key Takeaways:
- Spacer size depends on grout line width preference.
- Always use spacers during tile installation.
- There are multiple spacer sizes available for different effects.
4. How do I ensure a clean finish when cutting tiles?

Achieving clean cuts on tiles is essential for a professional look.
- Sharp Blade: Ensure that the tile cutter or wet saw has a sharp blade.
- Steady Hands: Apply consistent pressure and move steadily to avoid chipping.
- Practice: On scrap tiles, hone your technique before working on final pieces.
Key Takeaways:
- Maintain tools with sharp blades.
- Consistency and steadiness are key when cutting.
- Always practice on extra tiles first.
5. Why is grout necessary, and how do I choose the right one?

Grout fills the gaps between tiles and adds strength and aesthetics to the tiled surface.
- Types: There are sanded and unsanded grouts; the choice often depends on the width of the gaps.
- Color: Grout comes in various colors, allowing for creative design or a seamless look.
- Sealing: Some grouts need sealing to prevent moisture penetration and staining.
Key Takeaways:
- Grout provides strength and a finished appearance.
- Grout type and color depend on tile gap and design preference.
- Some grouts require sealing for protection.
6. How do I clean and maintain my tiling tools?

Proper tool maintenance extends their life and ensures effective performance.
- Cleaning: After use, remove adhesive and grout residues promptly using water and a cloth.
- Storage: Store tools in a dry place to prevent rusting.
- Regular Checks: Periodically inspect tools for wear and replace parts as necessary.
Key Takeaways:
- Clean tools immediately after use.
- Store in a moisture-free environment.
- Periodically inspect and maintain for optimal performance.
7. What safety precautions should I take when tiling?

Safety is paramount during any construction activity, including tiling.
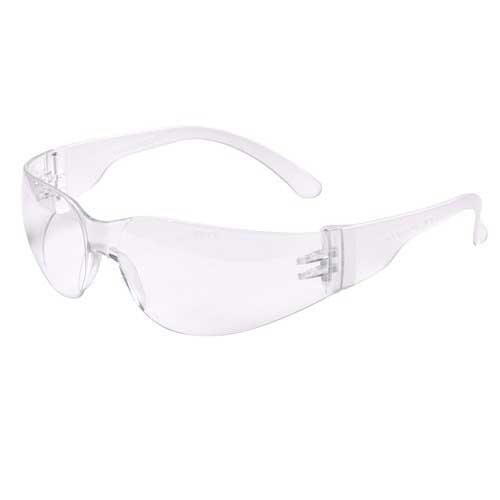
- Protective Gear: Wear safety glasses and gloves to prevent cuts and protect the eyes.
- Ventilation: Ensure adequate ventilation when working with adhesives and grouts to avoid inhaling harmful fumes.
- Safe Handling: Always handle tools with care, especially when using cutters or wet saws.
Key Takeaways:
- Always wear safety glasses and gloves.
- Ensure good ventilation when using chemicals.
- Handle tools with caution.
8. Can I tile on wooden surfaces?

Tiling on wooden surfaces is possible, but it requires extra precautions.
- Stability: The wooden surface must be stable, without any movement or flex.
- Plywood or Backer Board: Installing a layer of plywood or a cement backer board can provide a better substrate for tiling.
- Flexible Adhesive: Use a flexible adhesive that can accommodate wood’s natural movement.
Key Takeaways:
- Ensure the wooden surface is stable and rigid.
- Consider adding plywood or backer board for support.
- Use adhesives designed for wooden substrates.
9. How do I handle and store surplus tiles?

Storing surplus tiles properly ensures they remain in good condition for future use or repairs.
- Original Packaging: Store tiles in their original boxes to protect them from dust and damage.
- Elevated Storage: Place boxes on raised platforms or shelves, away from dampness.
- Labeling: Clearly label boxes with the tile type, size, and purchase date.
Key Takeaways:
- Retain tiles in their original packaging.
- Store away from moisture and potential hazards.
- Clearly label for easy identification in the future.
10. What’s the difference between a tile cutter and a wet saw?

Both tools serve the purpose of cutting tiles, but they function differently.
- Tile Cutter: A manual tool that scores and then breaks the tile. Suitable for straight cuts and smaller jobs.
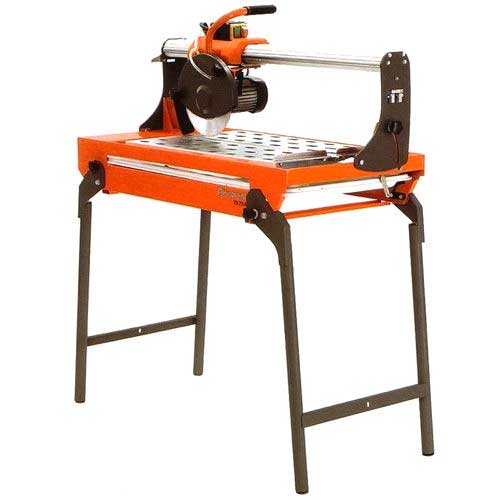
- Wet Saw: Uses water and a diamond blade to cut tiles, ideal for large jobs and intricate cuts.
- Choice: Depending on the project size and complexity, one might be preferable over the other.
Key Takeaways:
- Tile cutters are manual and ideal for straightforward cuts.
- Wet saws are powered and versatile for various cuts.
- The project dictates the most suitable tool choice.
Mastering the Art of Tiling
The intricacies of tiling extend beyond merely placing tiles on a surface. As illustrated in the above tips, the right tools, materials, and techniques are the backbone of any successful tiling project. From selecting the appropriate adhesive to understanding the importance of safety and tool maintenance, each step is crucial. As you embark on your tiling endeavors, let these insights guide you towards achieving a flawless finish. Remember, mastery in tiling is a fusion of artistry and precision, and with the right knowledge, you’re well-equipped to transform spaces with confidence and expertise.


